GitHubのアカウントの作り方は以下の記事で解説しております。
参考にどうぞ。
![【図解あり】GitHubアカウント作成方法を解説【数分で完了します】](https://images.ctfassets.net/o1bgnefm7hbe/2XaeWybW9V713xW1Lg1B5/c0c57b6fa3c41d8a383179c219b2df63/astronaut.png?w=260&h=146&q=50&fm=png)
GitHubにログインします。
Organizationを作る
![new_organization](https://images.ctfassets.net/o1bgnefm7hbe/4oUWbq3ftYLXinpAO6kQ87/e39f7293a414e24ef57a727926d0b66d/new_organization.png?w=760&h=570&q=50&fm=png)
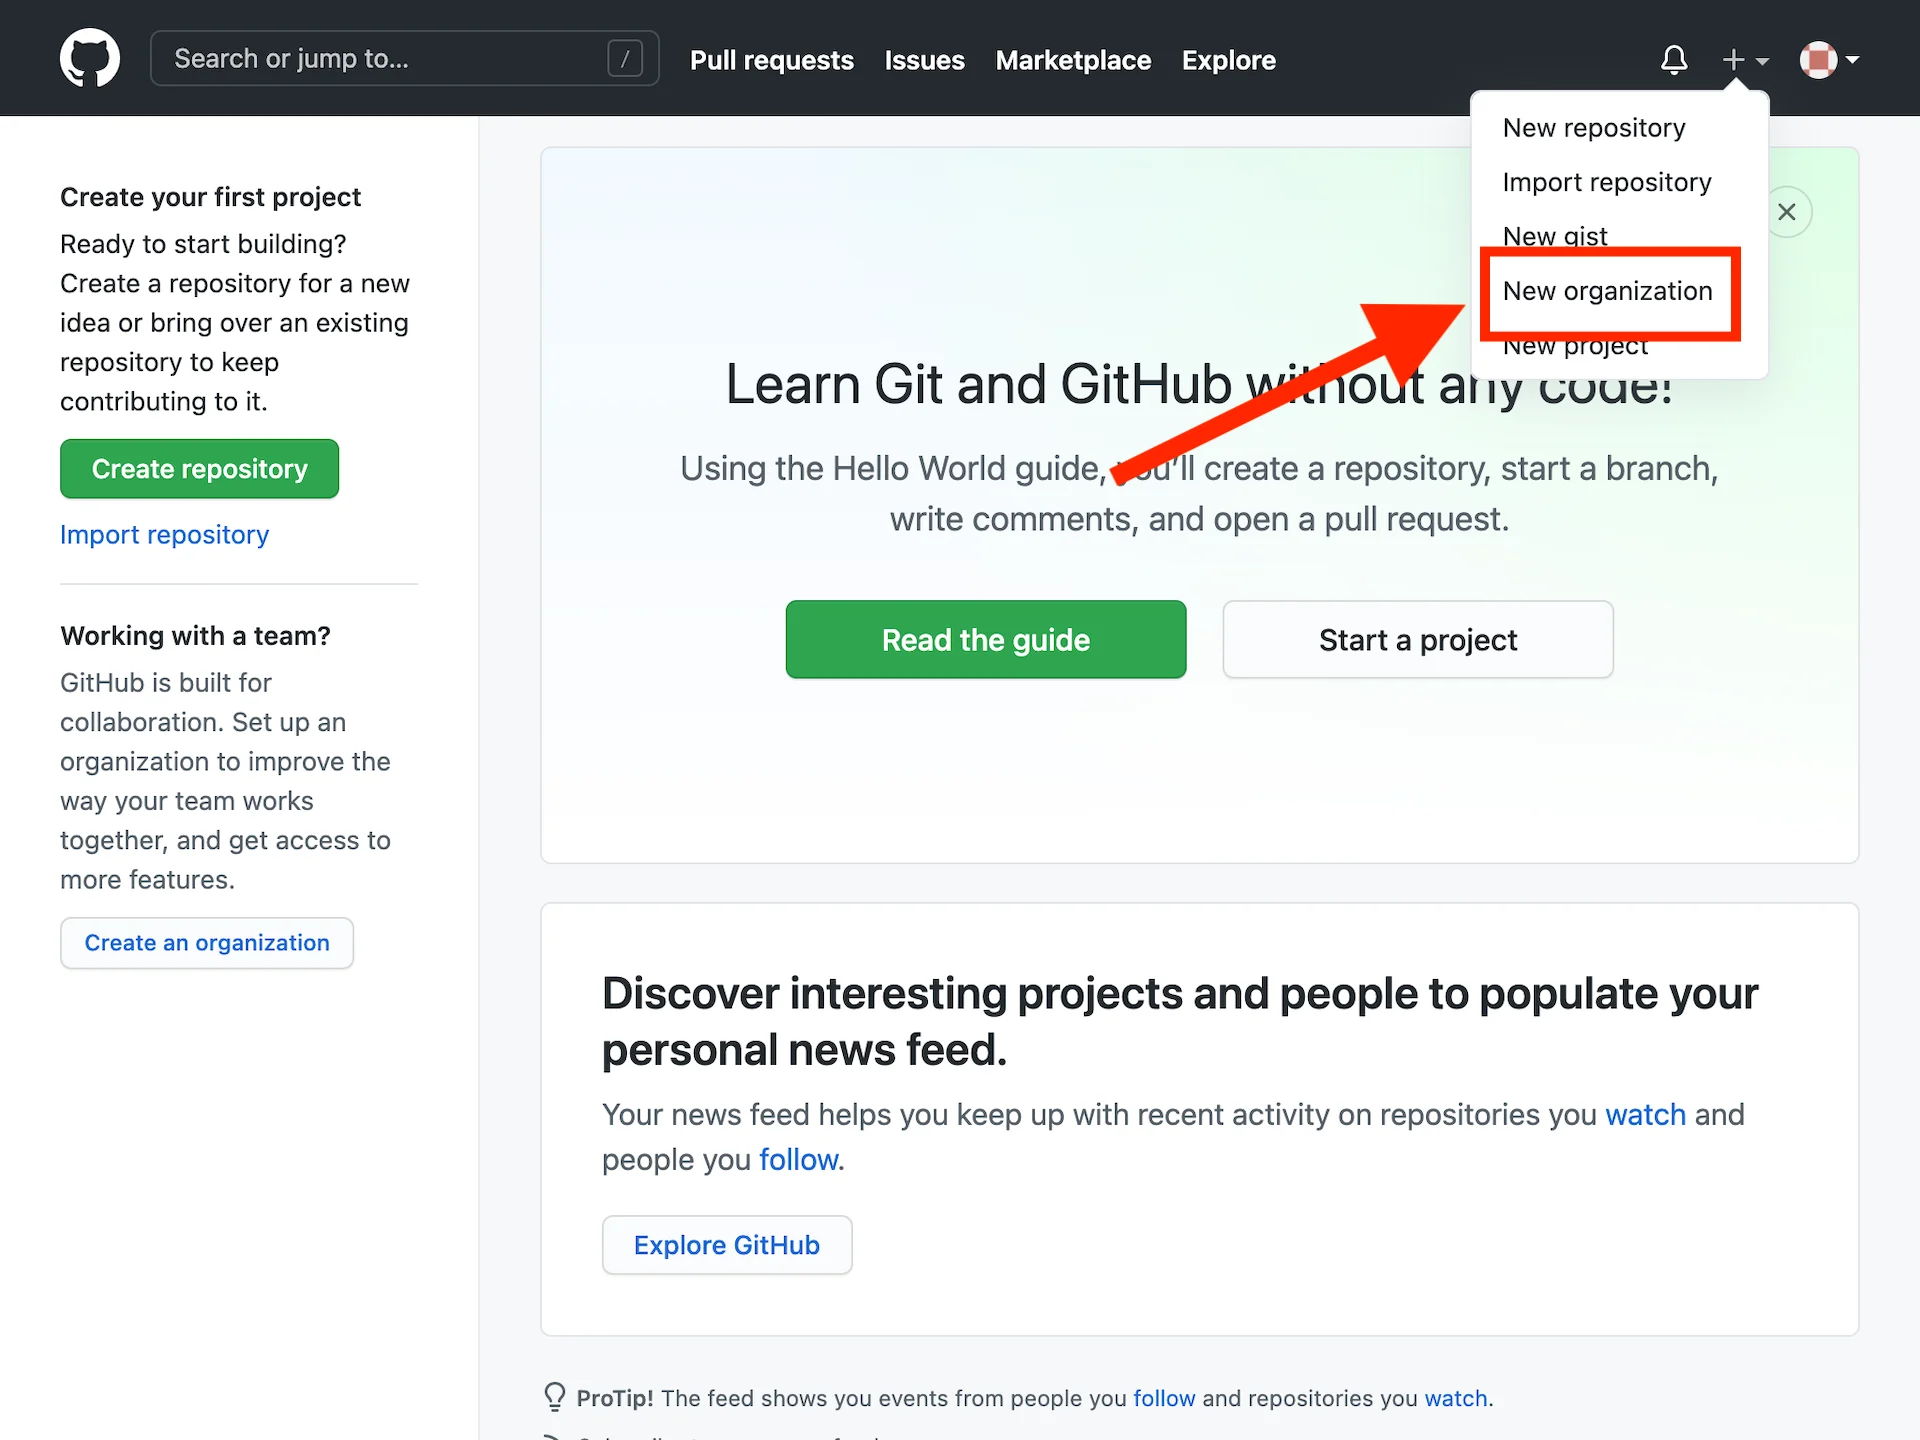
右上の+ボタンをクリックして、「New organization」をクリックします。
![choose_plan](https://images.ctfassets.net/o1bgnefm7hbe/68opma3ex37sxnX6T0k8ne/3d080f15bb997c83f6ad667e9d37a60a/choose_plan.png?w=760&h=570&q=50&fm=png)
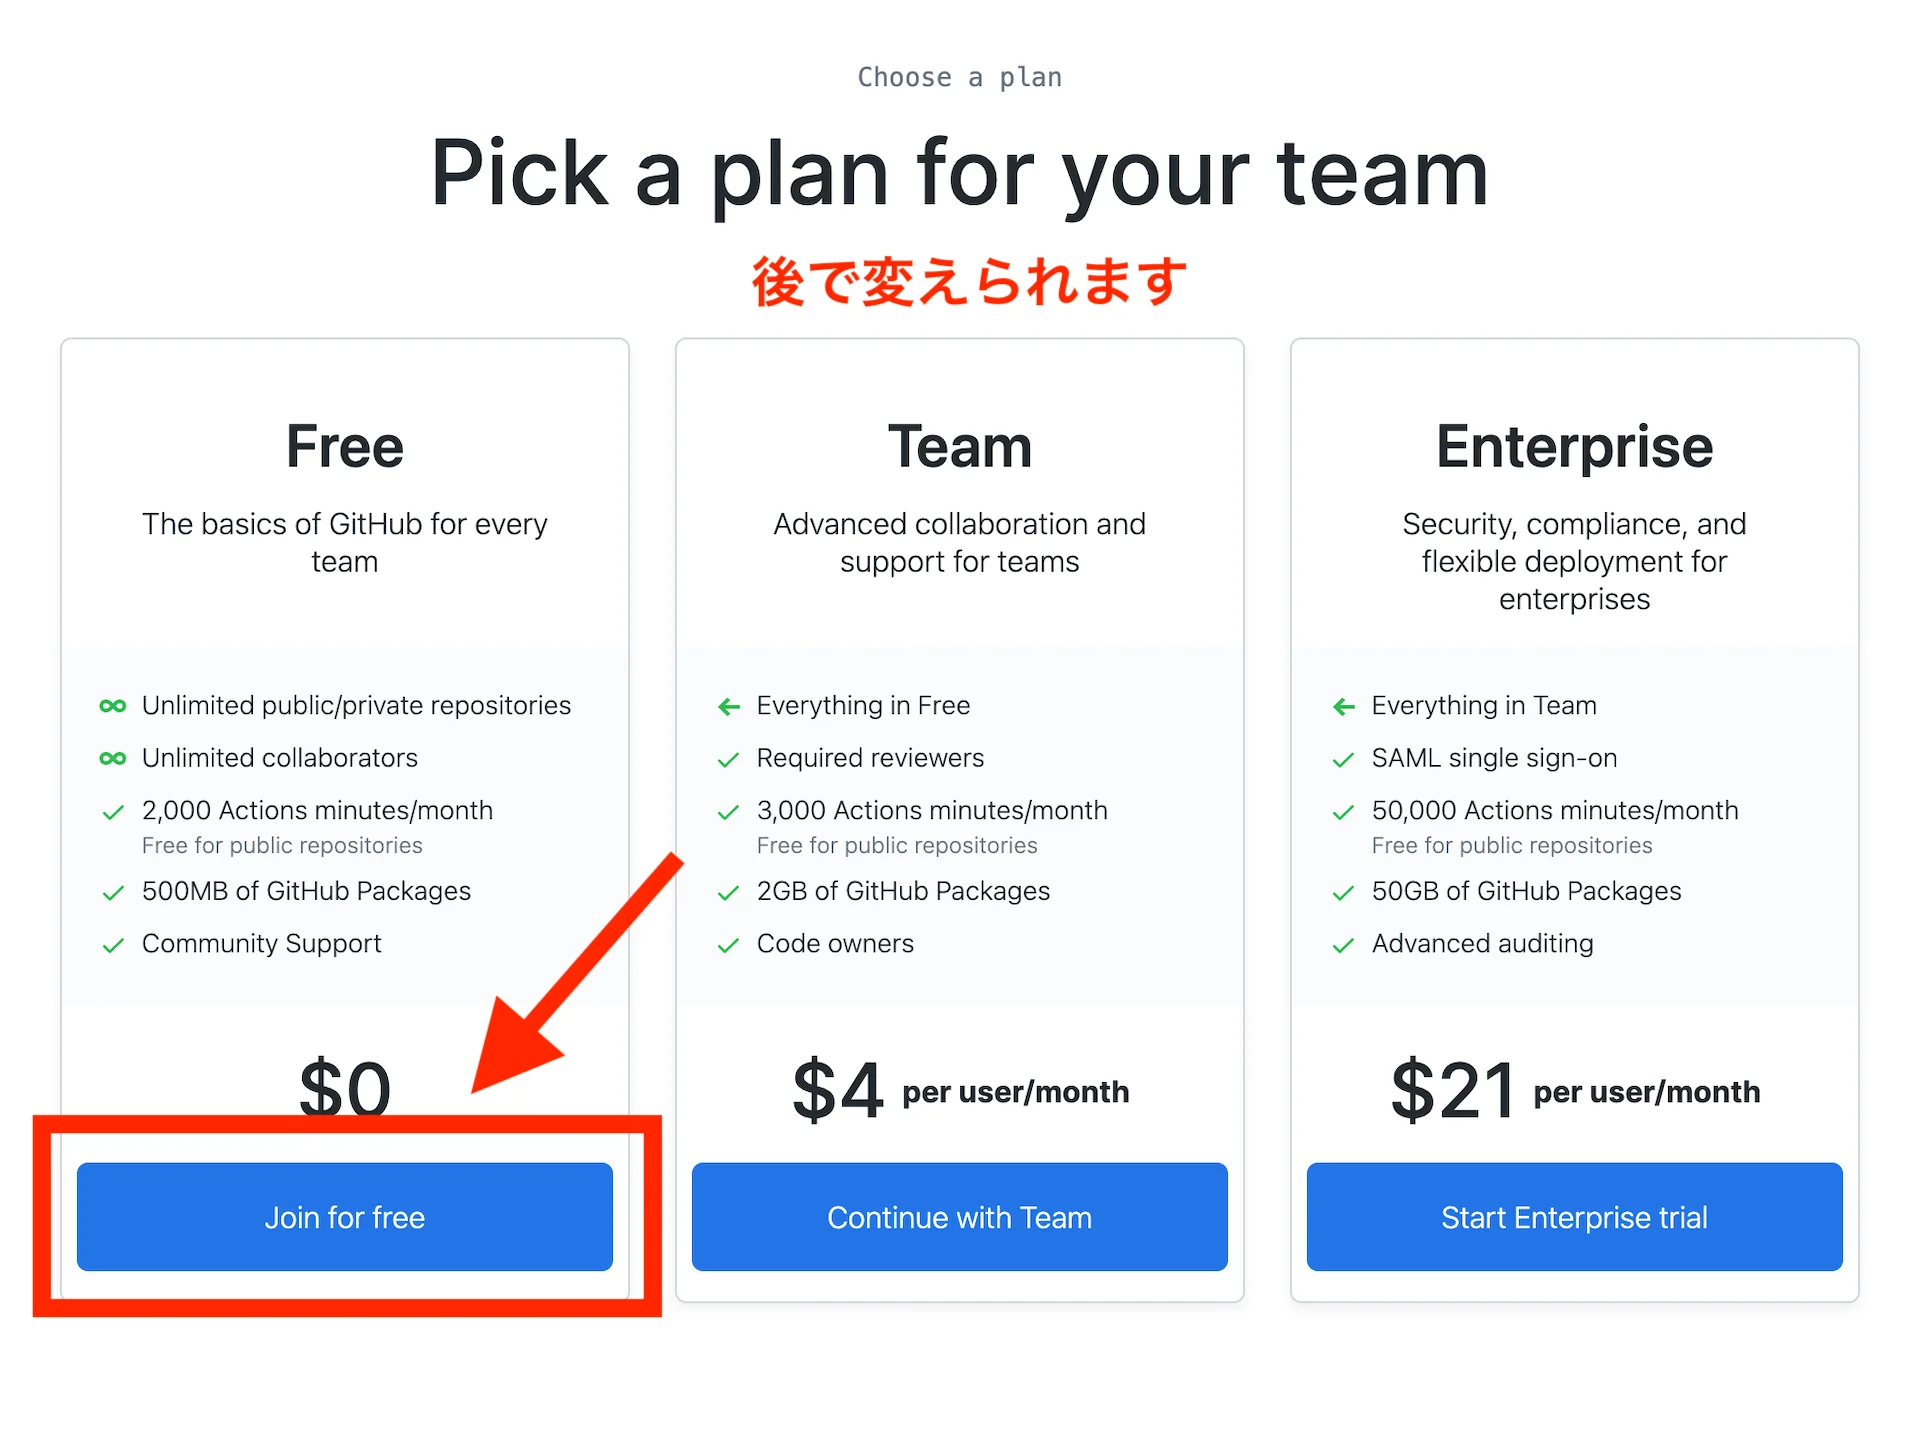
ここでは無料プランを選ぶことにします。
プランは必要に応じて後で変えられます。
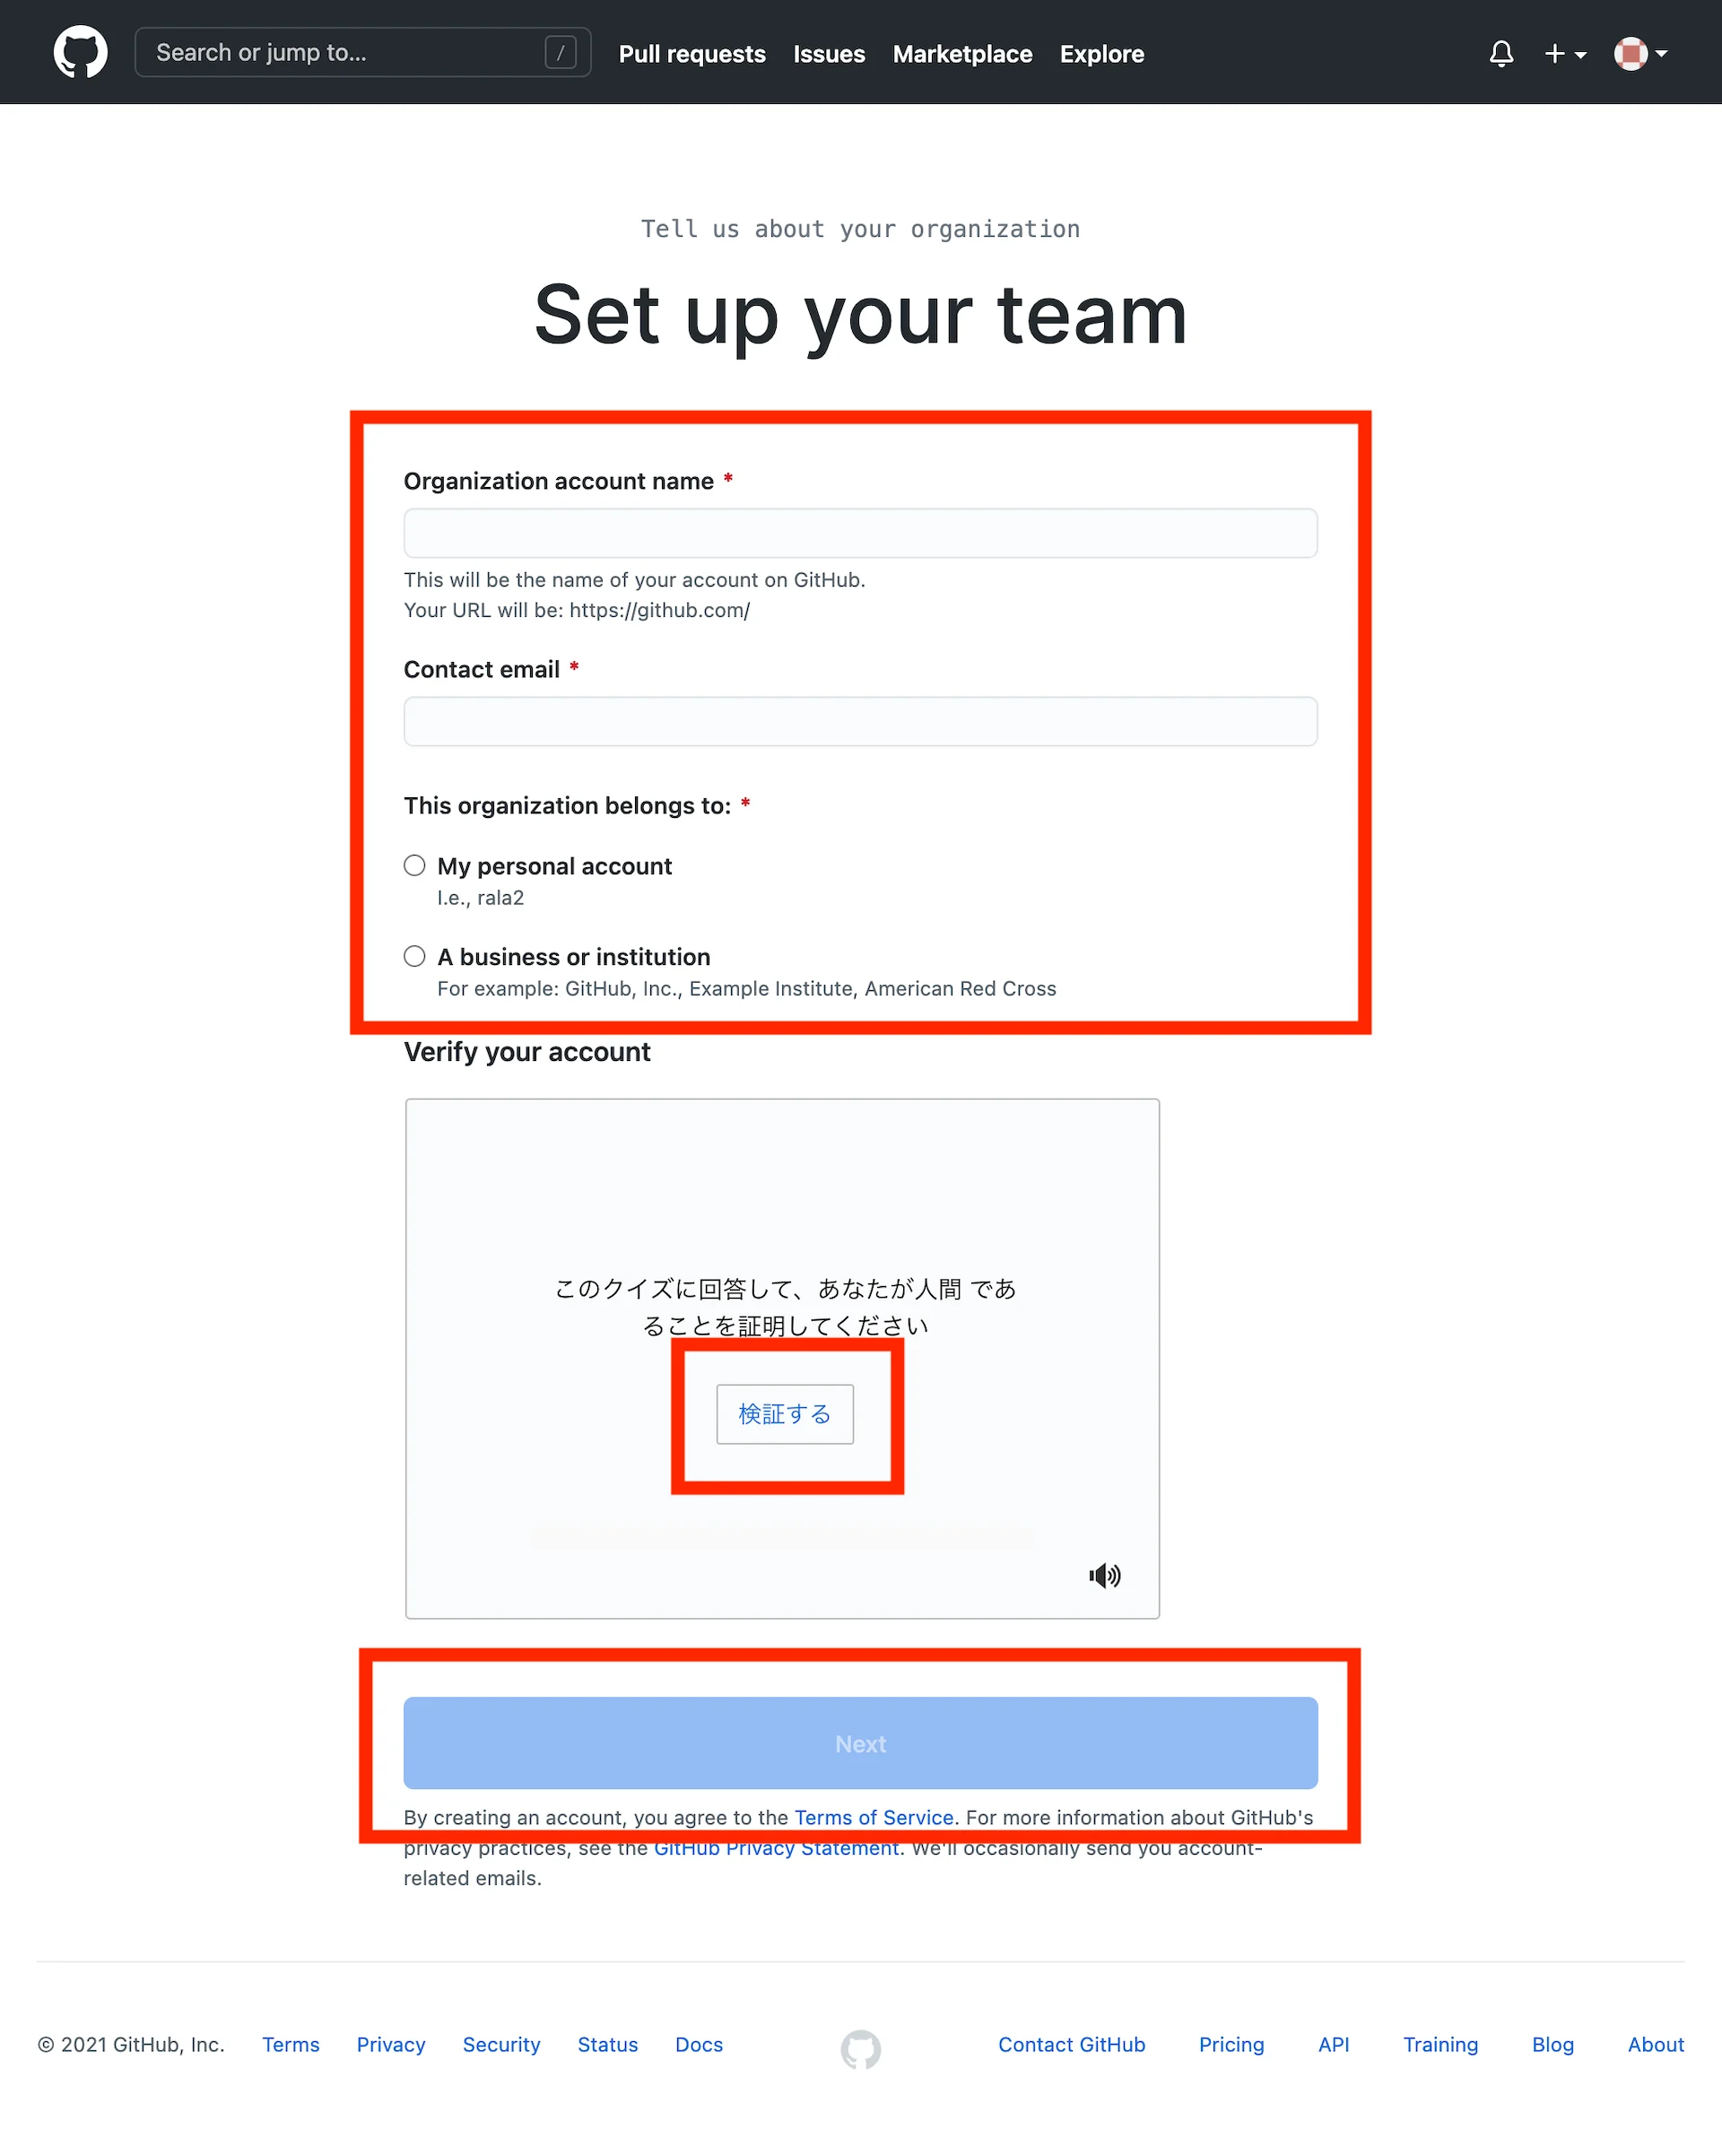
![set up your team](https://images.ctfassets.net/o1bgnefm7hbe/3aoGqxMF1SbynoVG2cbcGT/d8d0573f13adab8356440b981bb056f9/set_up_your_team.png?w=760&h=952&q=50&fm=png)
Organization名
代表者のメールアドレス
個人なのか法人なのか
上記を入力します。
少し下の「検証する」をクリックして簡単なクイズに回答します。
「Next」をクリックします。
![welcome to github](https://images.ctfassets.net/o1bgnefm7hbe/2GHyxneYUOflawLFl73vIZ/9c6f69903a9b97054ea1eed24176301e/edited_welcome_to_github.jpg?w=760&h=428&fl=progressive&q=50&fm=jpg)
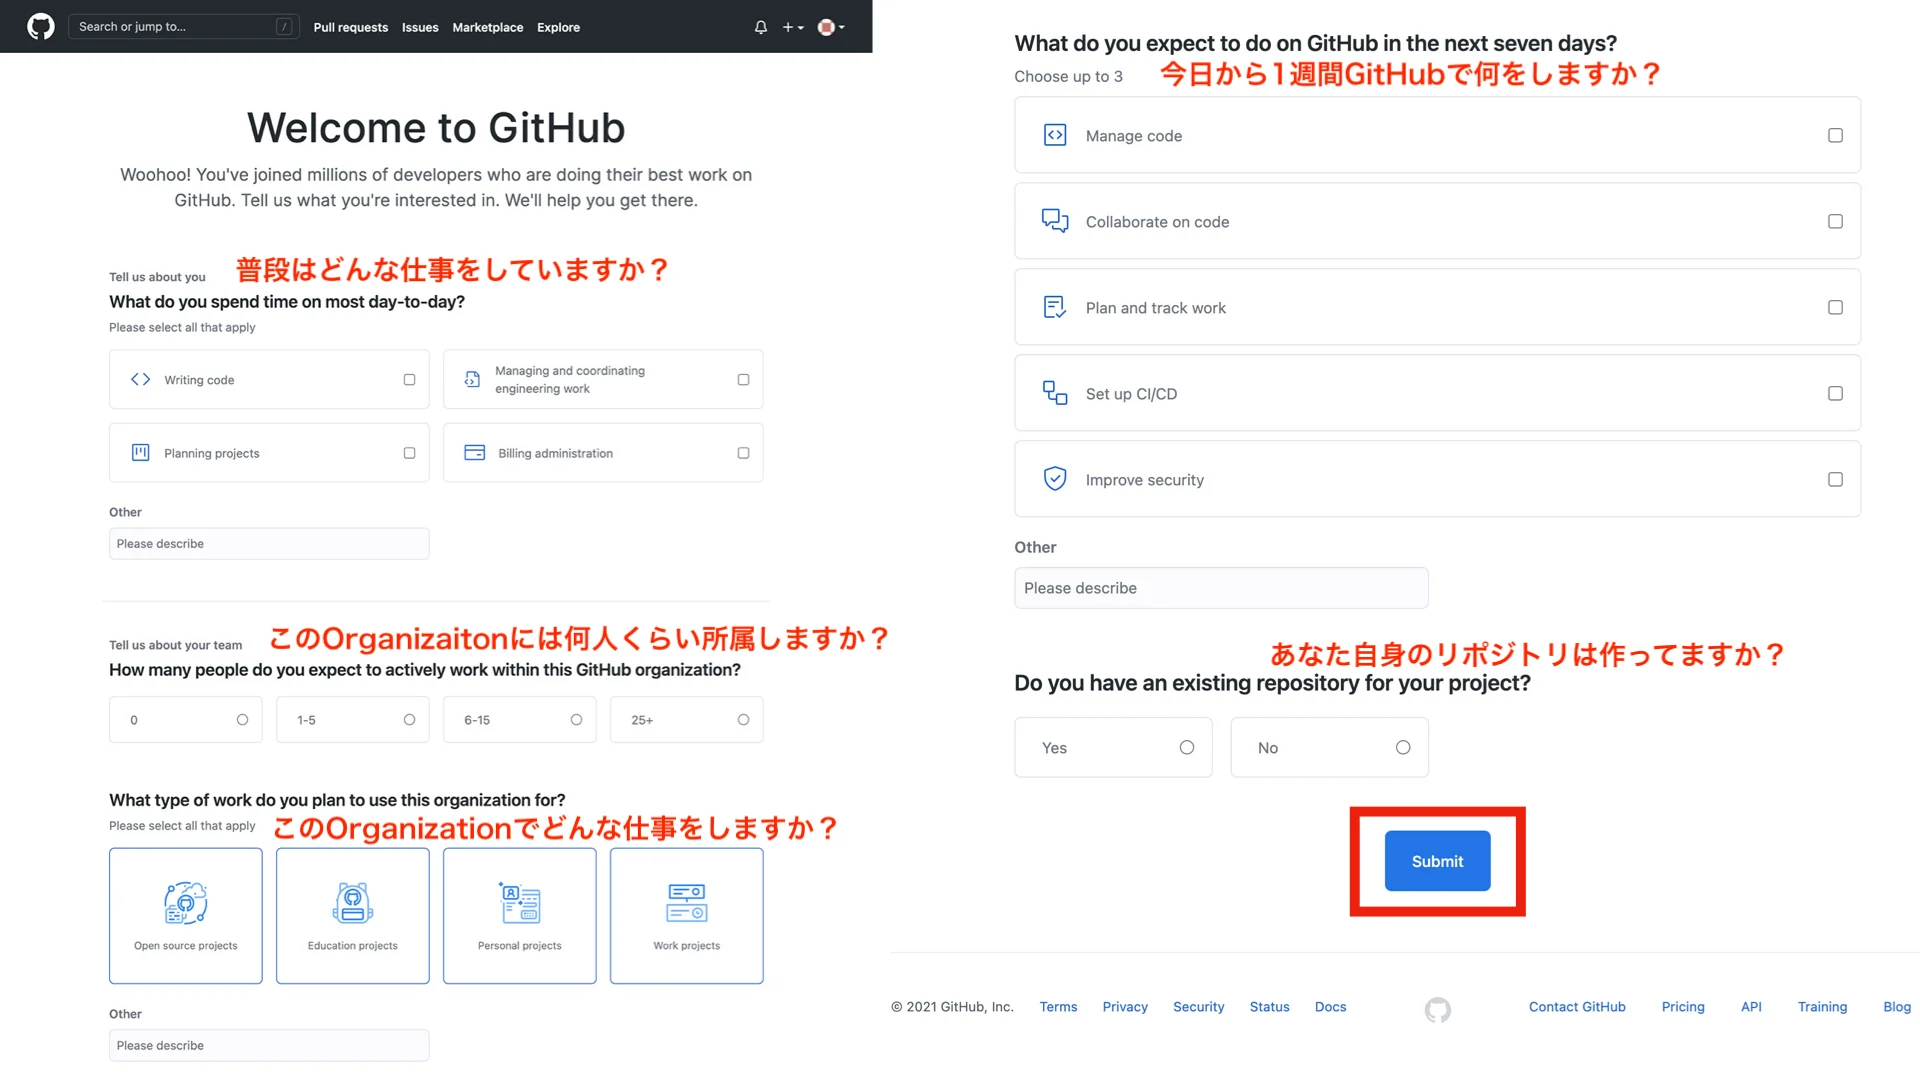
「Welcome to GitHub」というページが開きます。
アンケートなのでどう答えても今後影響はありません。
5つの質問に答えて「Submit」をクリックします。
![welcome to organization](https://images.ctfassets.net/o1bgnefm7hbe/phuus05k4qXzej3eLhasY/3470e09f30357d037a2e05201eaa38aa/welcome_team.png?w=760&h=570&q=50&fm=png)
「Welcome to (Organization名)」というページが開きます。
「Complete setup」をクリックします。
Organizationが作成され、トップページが表示されます。
![invite github](https://images.ctfassets.net/o1bgnefm7hbe/1RMZlWt7kIfZdqeqMn88LA/4cc1c3bc832425946a032526185a68c6/invite_github.jpg?w=760&h=428&fl=progressive&q=50&fm=jpg)
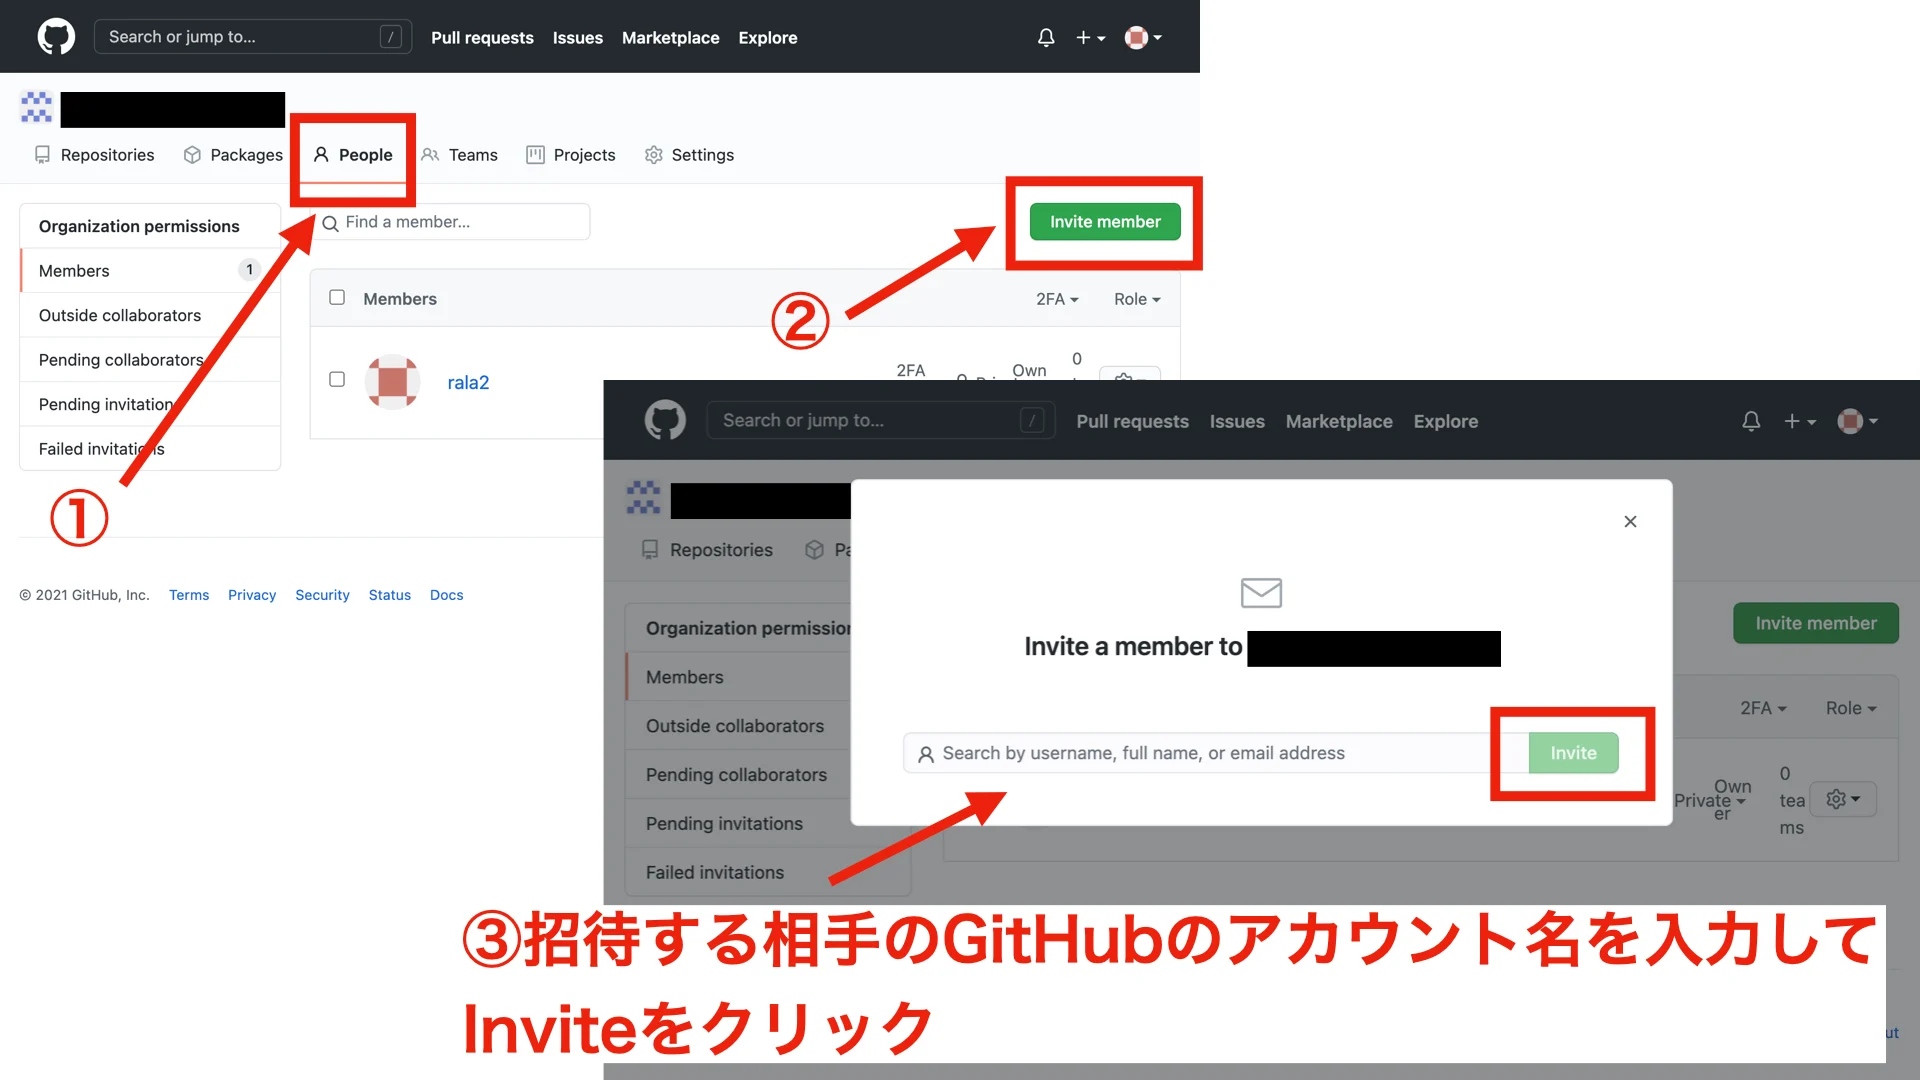
Organizationにメンバーを招待します。
「People」タブをクリックして、「Invite member」をクリックします。
招待する相手のGitHubのアカウント名を入力してInviteをクリックします。
![role in organization](https://images.ctfassets.net/o1bgnefm7hbe/3l0tDcLeLjFoDRg9RifAId/fbd31460656cc64b1a9d7f15b093c37a/role_in_organization.png?w=760&h=570&q=50&fm=png)
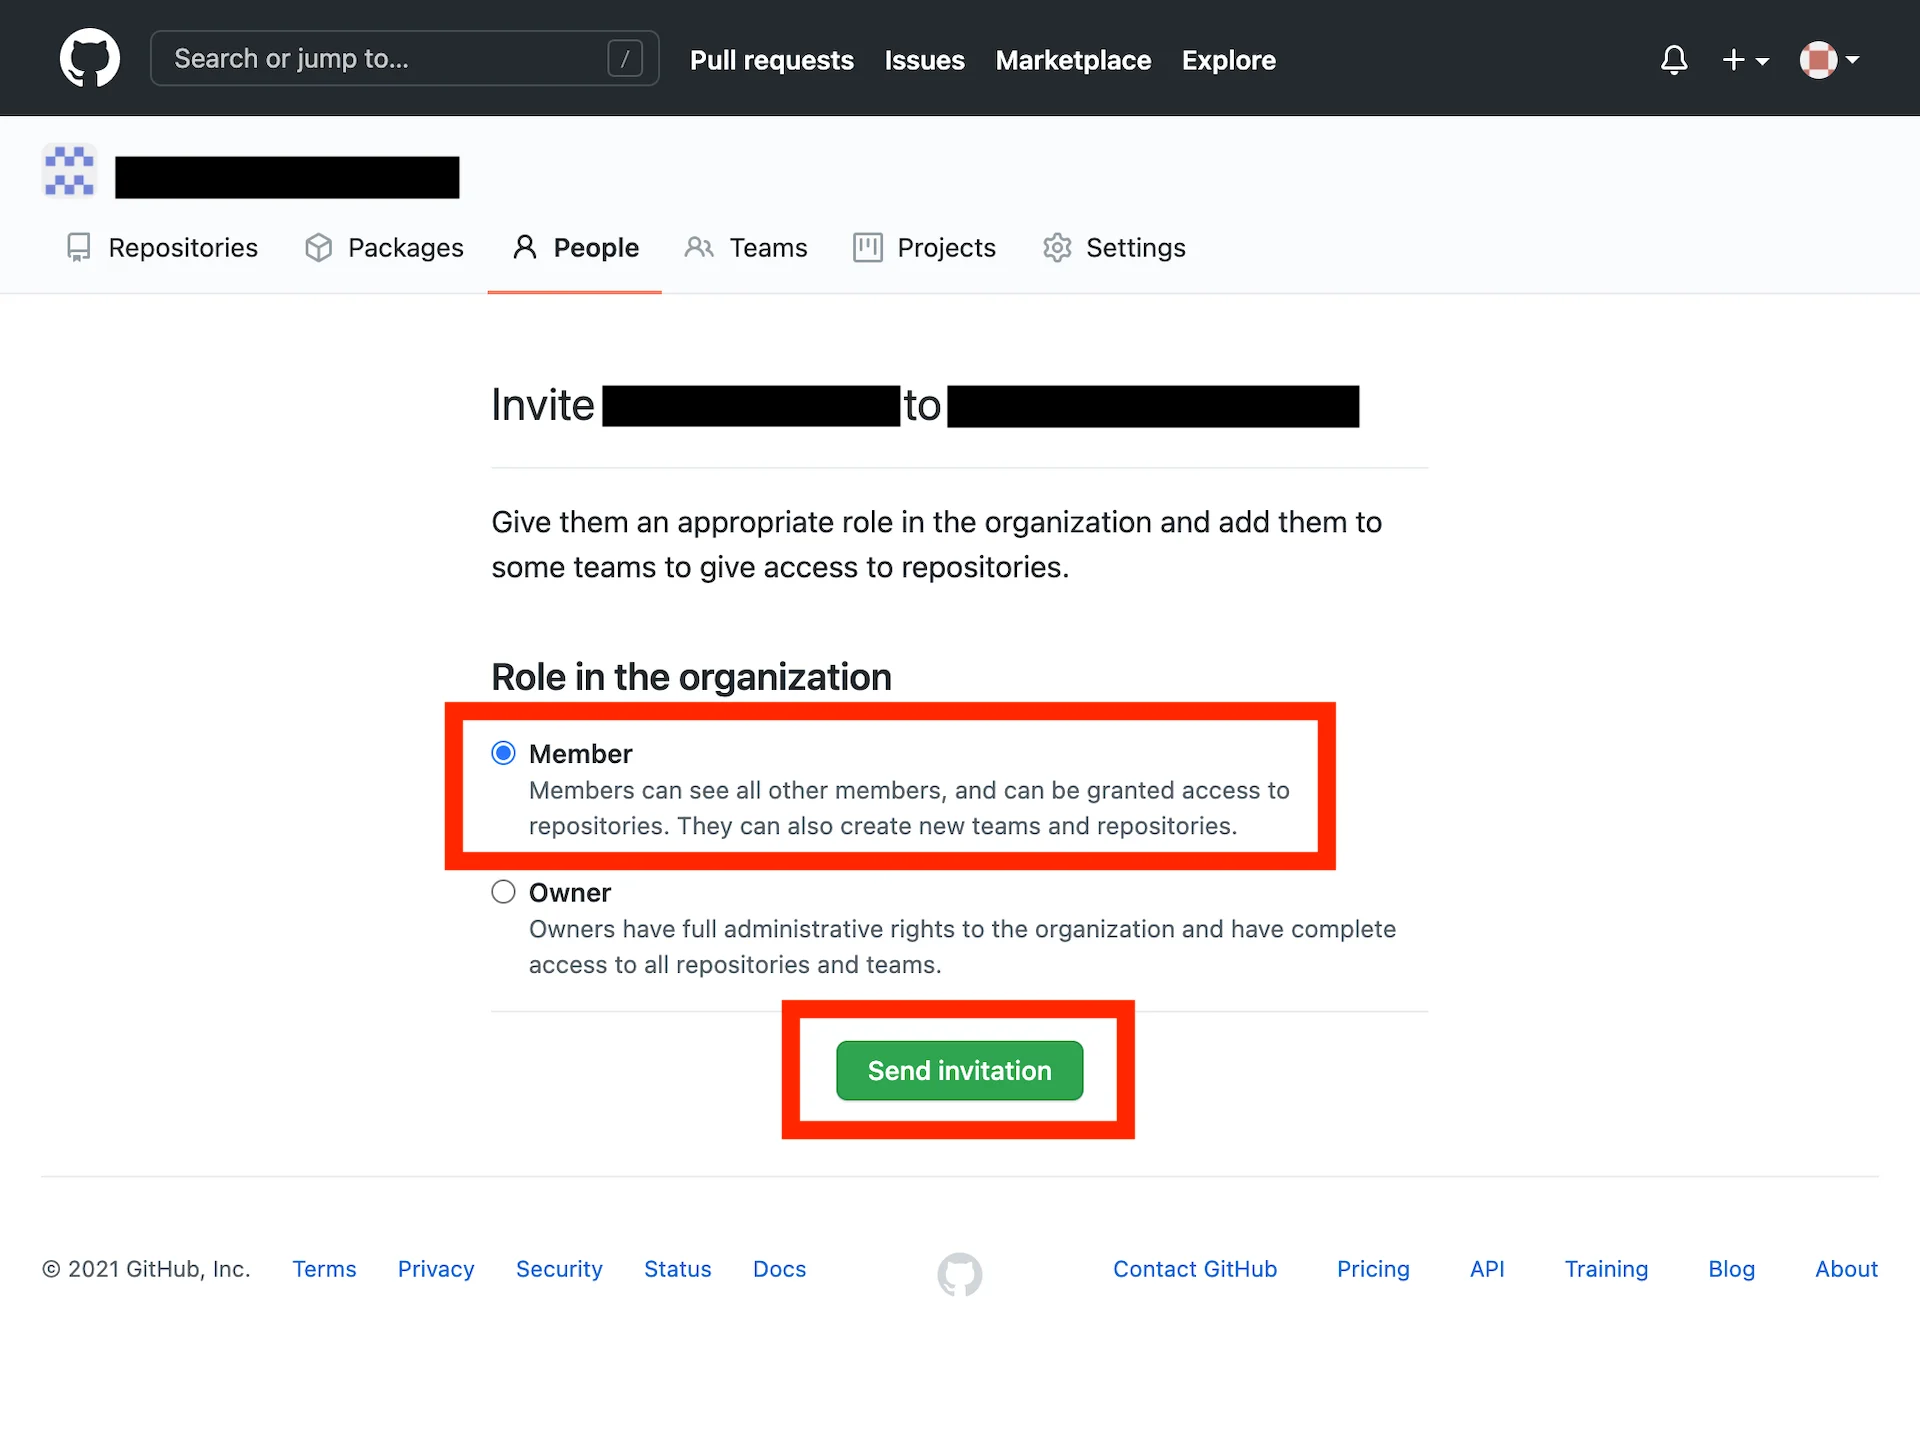
「普通メンバー」として招待するか、「管理者」として招待するか聞いてきます。
「普通メンバー」でいいと思うので、「Member」を選択して「Send invitation」をクリックします。
招待する相手にメールが届きます。
![email join](https://images.ctfassets.net/o1bgnefm7hbe/5cm3sXmIsZzvJuN651FSwf/45576e20bc5cecd6f45277a7a3de1086/email_join.png?w=760&h=449&q=50&fm=png)
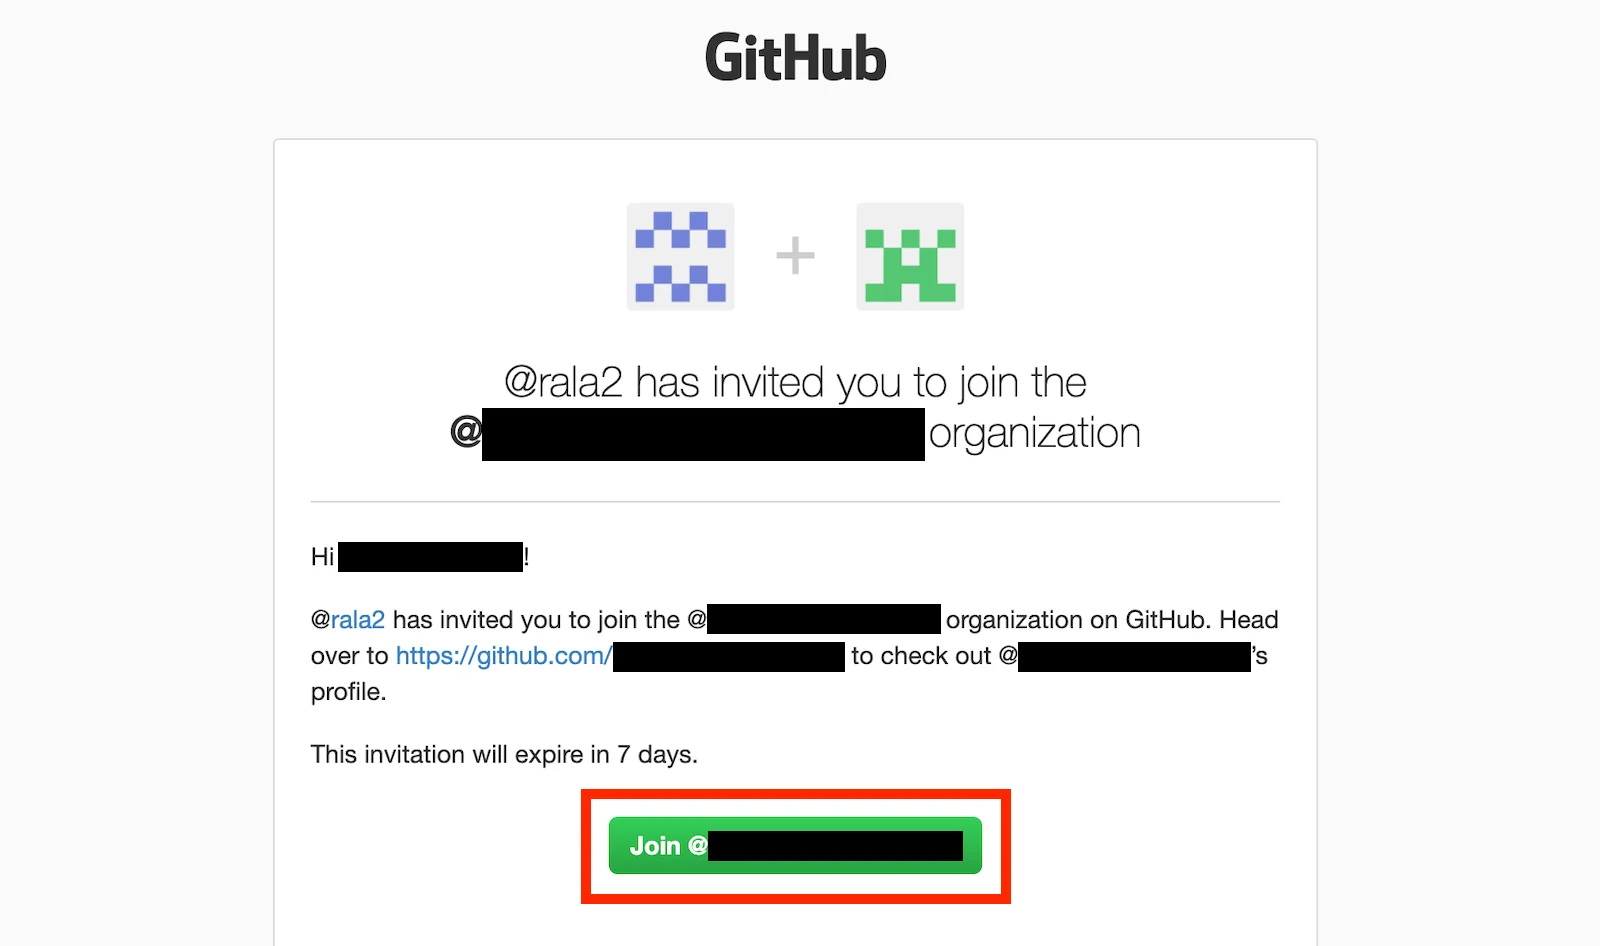
招待された人はメール内の「Join @(Organization名)」をクリックします。
![join](https://images.ctfassets.net/o1bgnefm7hbe/6wCAaCglRelOrpq2UfEgnF/04c208cb9d0c846696a51d92a23dfb55/join.png?w=760&h=570&q=50&fm=png)
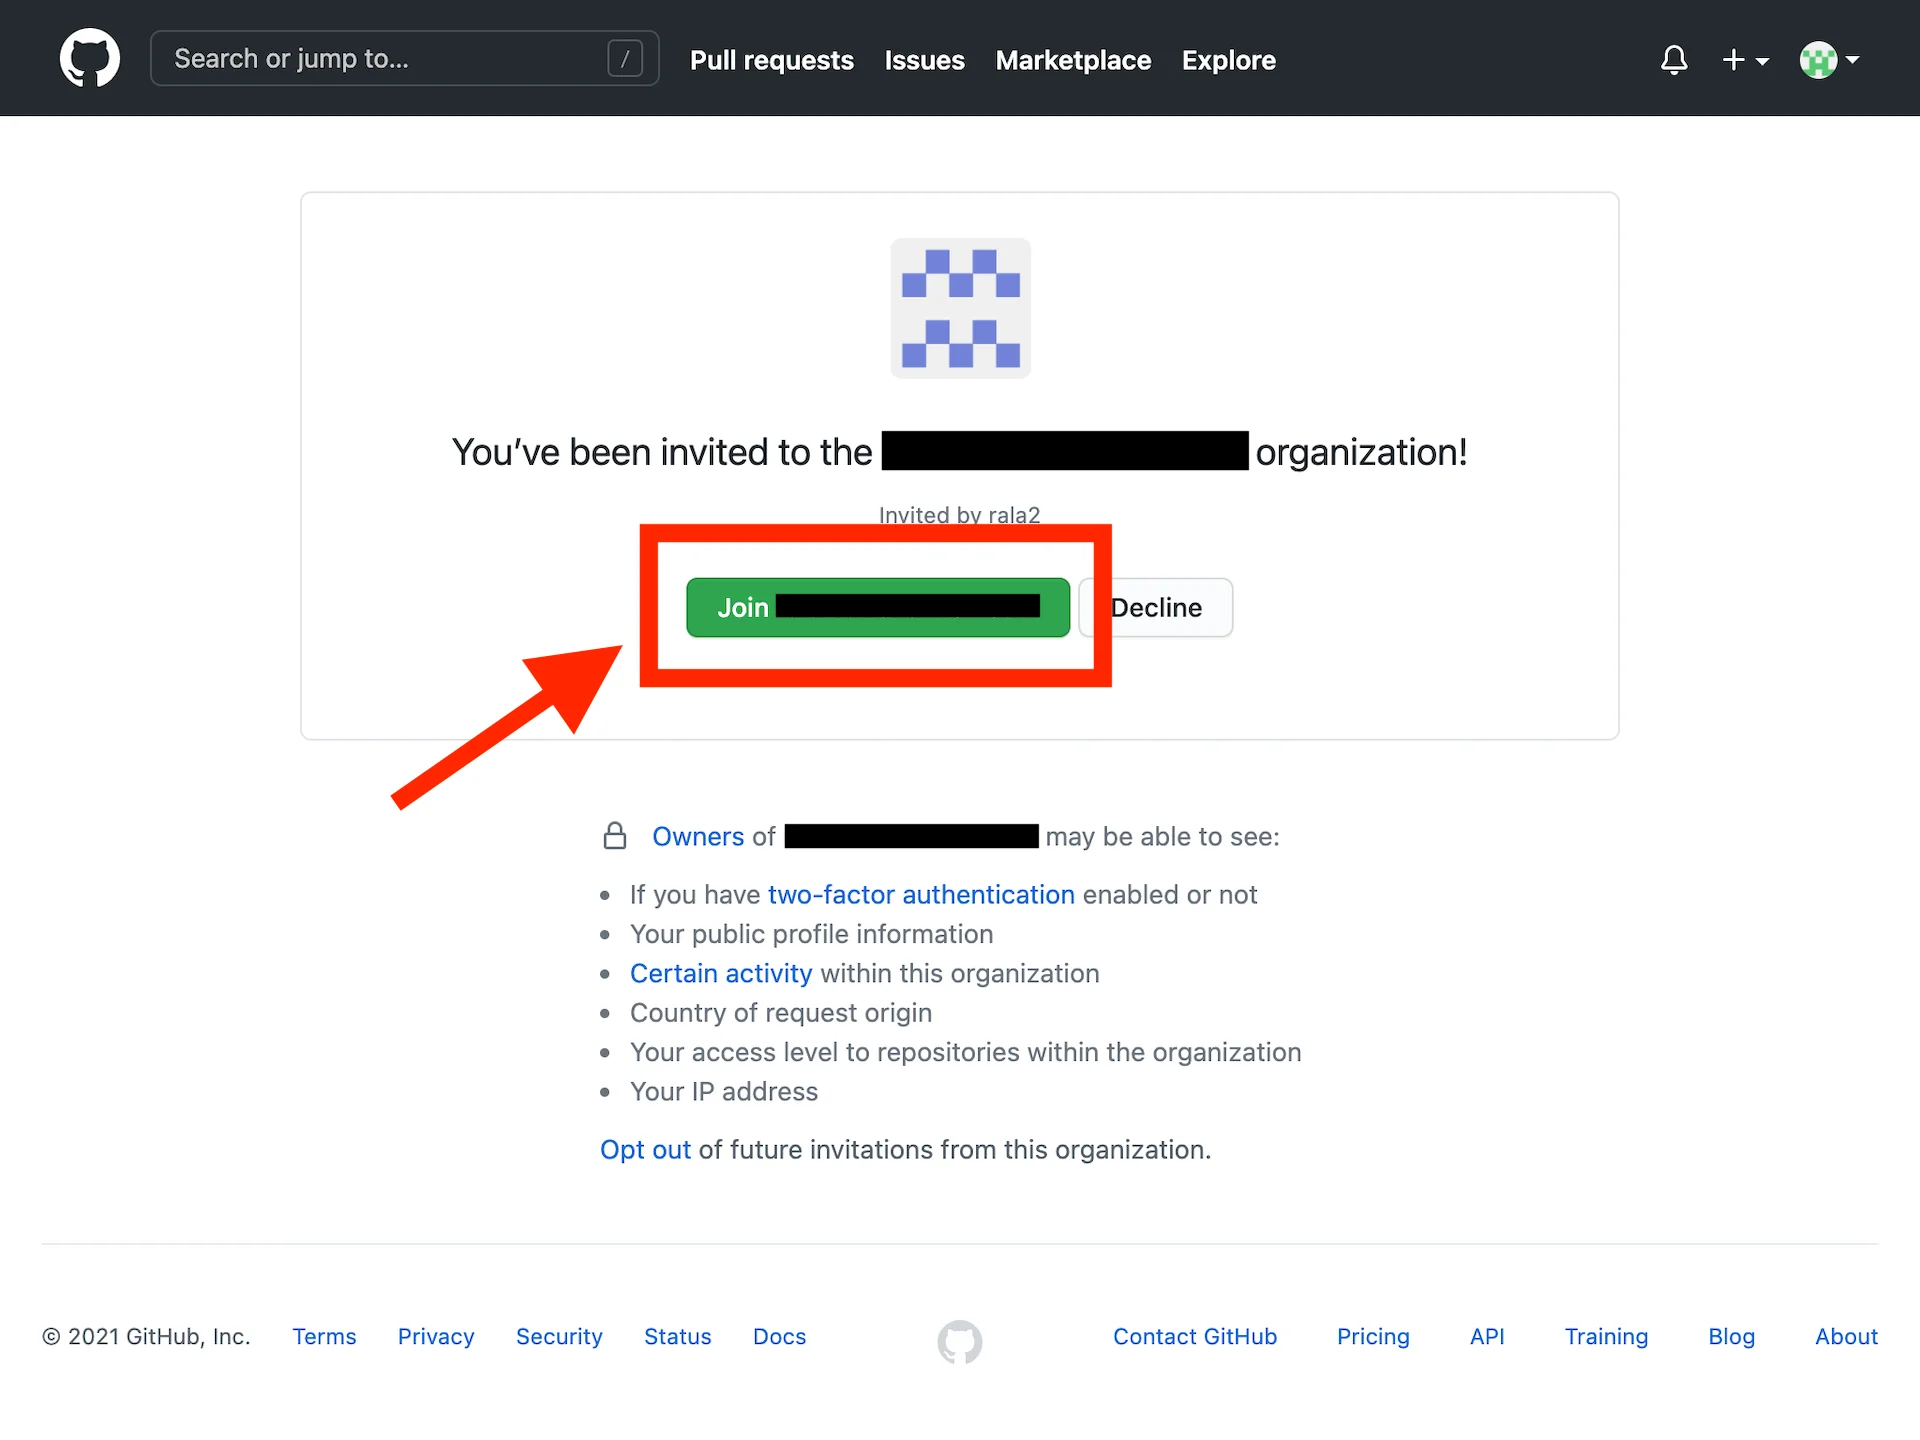
GitHubのページが開きます。
招待された人が「Join (Organization名)」をクリックします。
これで、招待された人はOrganizationに所属したことになりま す。
![organization access](https://images.ctfassets.net/o1bgnefm7hbe/5if91SYfBSysHfdIWODwzm/00bf9ef0a204a38ecb531eda459885a4/organization_access.png?w=760&h=428&q=50&fm=png)
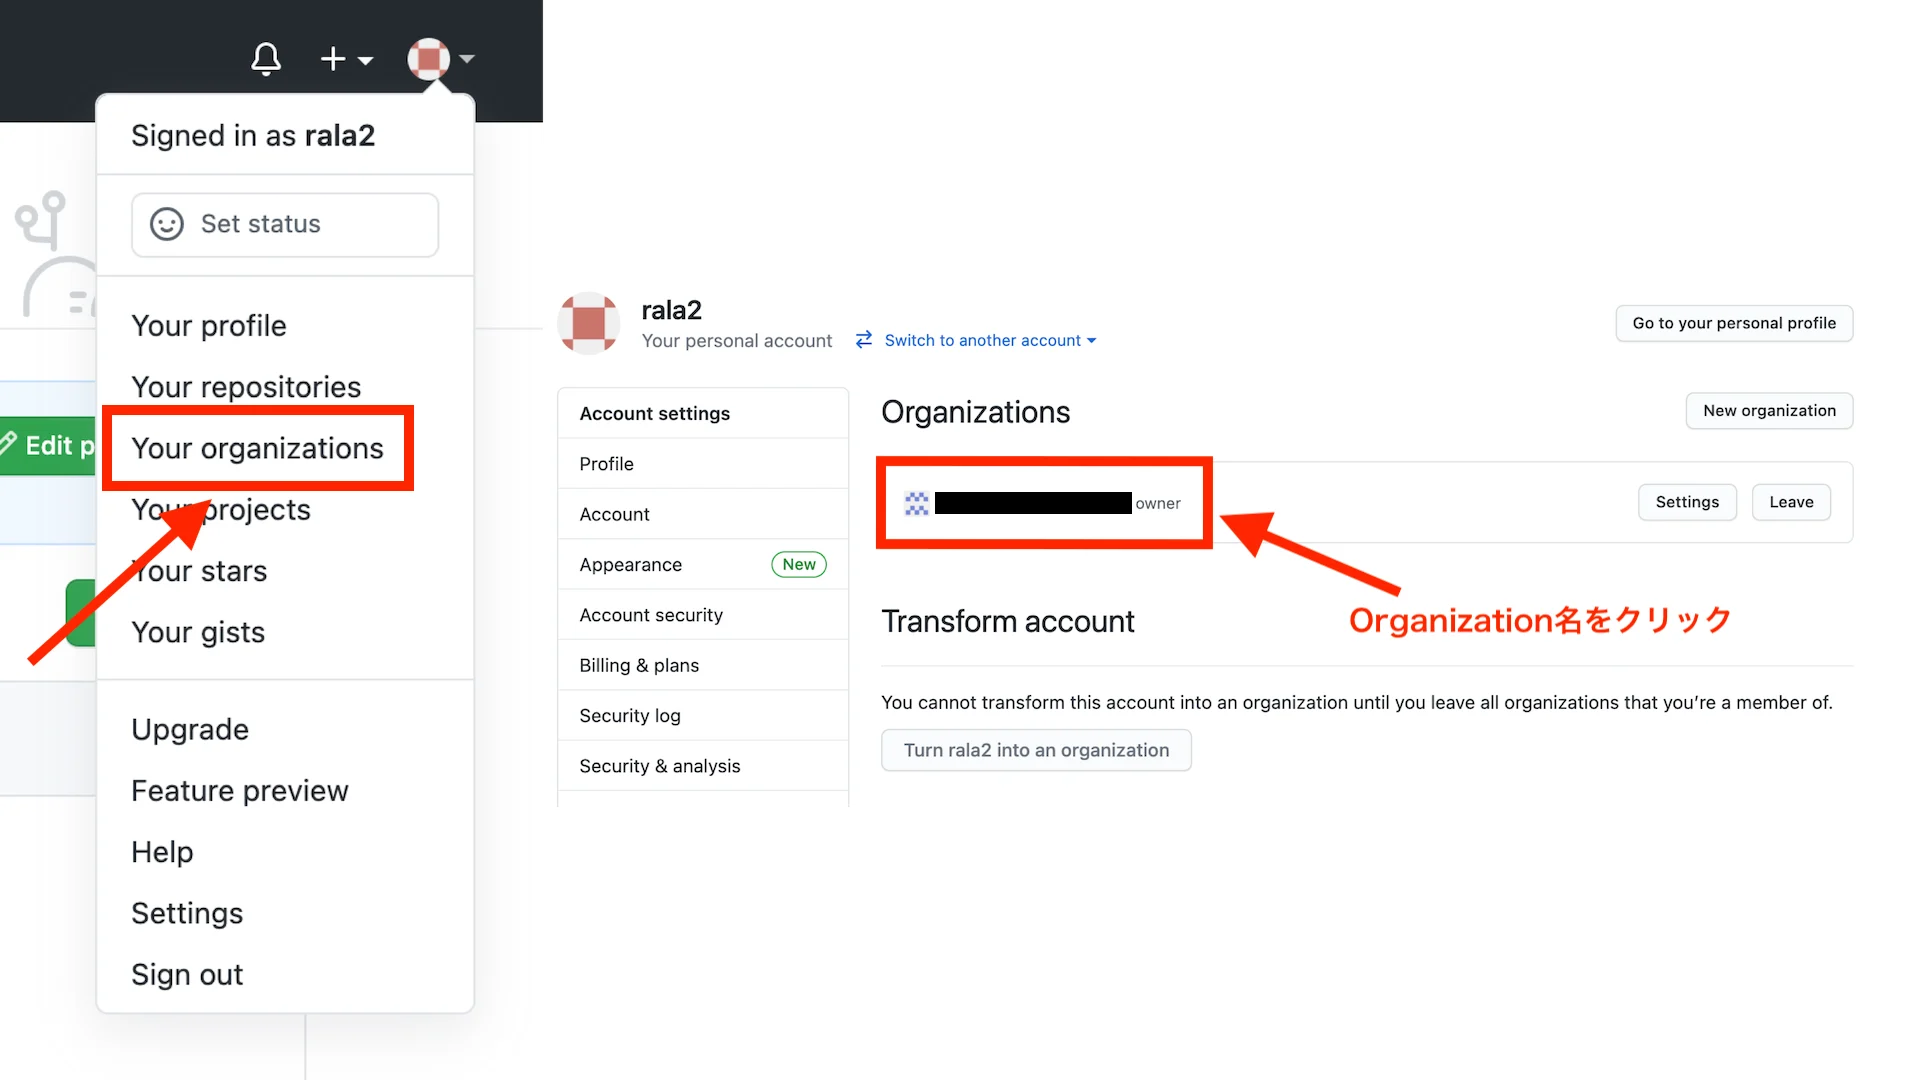
Organizationの人数が増えているか確認してみましょう。
GitHubページの右上の+ボタンをクリックして、「Your organization」をクリックします。
Organization名をクリックします。
![finish organization](https://images.ctfassets.net/o1bgnefm7hbe/28yammwsUN5ypVtLp346C/d485185a8d5a06e54985a55395105be5/finish_organization.png?w=760&h=570&q=50&fm=png)
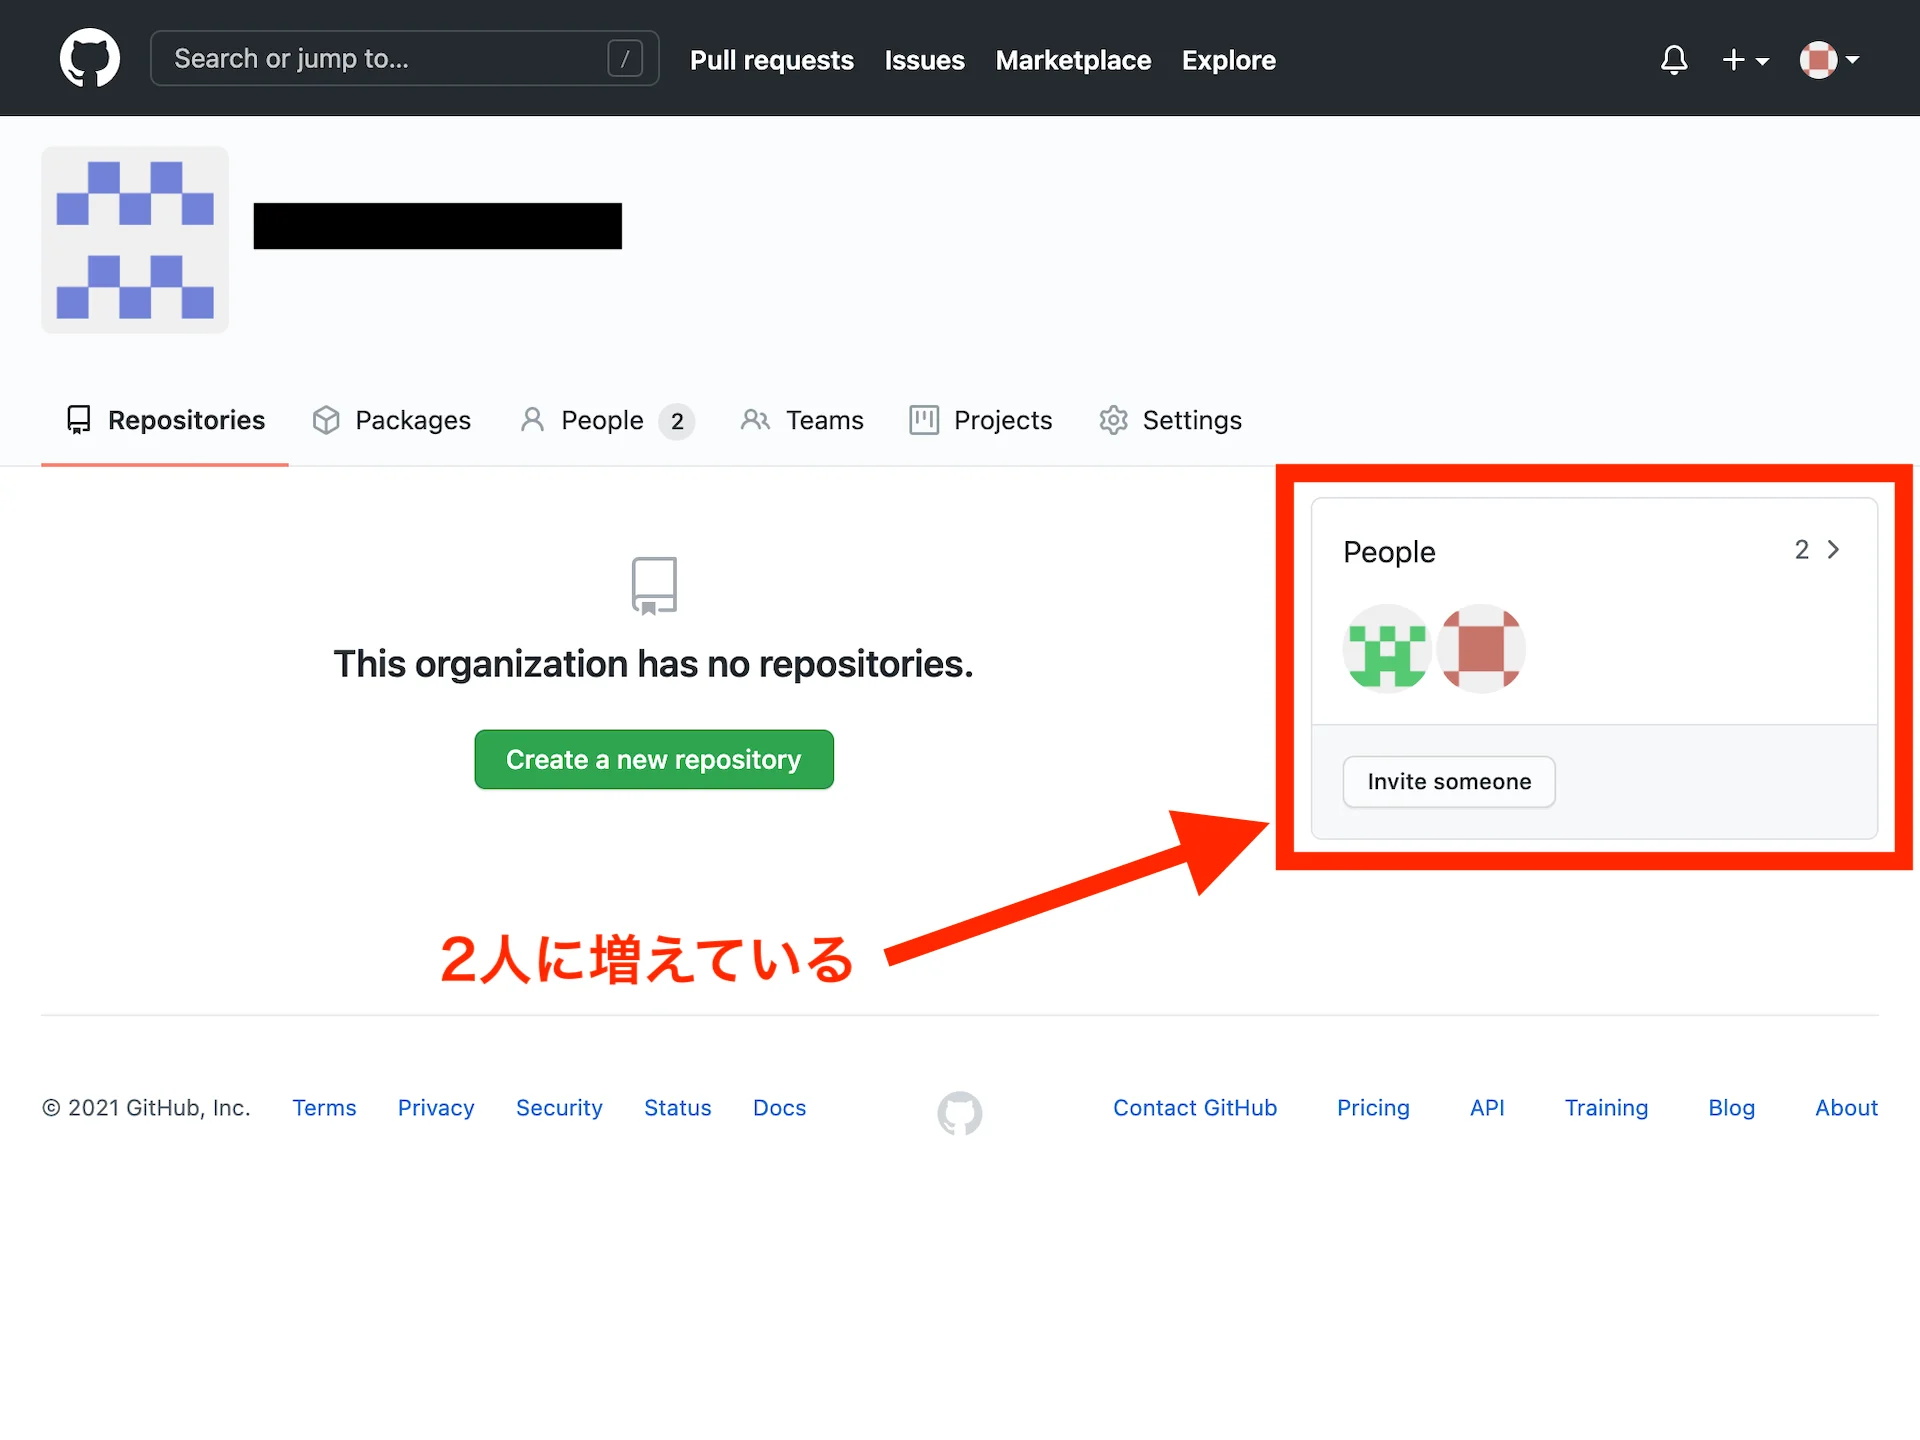
OrganizationのPeopleが2人に増えています。
これで、GitHubで「Organizationの作成」と「メンバーの招待」が完了です。
記事は以上です。